
|
DIY Ghosthunting |
|
Welcome to Do-It-Yourself Ghosthunting!
Ghost-hunting groups exist all around the country, fueled by the numerous television shows on the subject.
"Ghost Hunters" continues to be the #1 show on the Travel Channel, as it has been for years.
This has inspired many people to pick up ghost-hunting equipment and try their own hand at the things that they see on television... but there's only one problem - the equipment is ExPeNsIvE!!!
The most popular proximity sensor sells for $200. A Paranormal Music Box sells for $300 all the way up to $800. A "Yes/No" Communication Device easily runs $300. How can the average person afford this?
If you're like me, you can't. Spending a thousand bucks or more to assemble an array of ghost-hunting equipment just isn't an option. Thankfully, there's a better way - do-it-yourself ghosthunting gear.
Here on DIYghosthunting.com you'll find original videos that I personally made, assembling ghosthunting gear at a fraction of what you'd pay commercially. I've researched and built all of these items, and I made these videos explaining exactly how you can do the same thing - that's my voice in the videos giving you instruction!
As for the parts, if you order them from the parts-list for each device, they don't come from me. They come from the most trusted merchant in the world, Amazon.com. Simply click on the items in the parts-list to add them to your cart, and in a couple of days they'll be on your doorstep, with all of the security and reliability that you've come to expect from Amazon.
Let's dive right into it!
|
For all the Do-It-Yourself ghosthunting equipment that I've built, I used a glue called JB KwikWeld. It has two parts that you mix together with a toothpick in equal amounts. It sets up in 6 minutes, and cures in just a few hours. A lot of folks online use a craft hot-glue, which is easier, but I don't believe holds as well. JB QuikWeld is insulative, not conductive, so it's perfect for doing electronic projects. It should be available at your local hardware store, or here's a link to by JB QuikWeld on Amazon. |
Energy Pump
The Energy Pump is a ghost hunting device that creates a magnetic field. This concept first caught my attention when I was on a paranormal investigation with several other people. We were getting some weak responses, and one of the investigators said to the spirit, "If you're having trouble coming through, please take some of my energy - I'm happy to give it to you."
I've often heard that the intensity of any interaction with a spirit depends on how much energy they can manifest. The purpose of the Energy Pump is to put energy out there that, if needed, a spirit can tap into and use to manifest. Now, is all that true? I don't know - I'm still experimenting. I'll leave the final answer to you and your own experiences.
Meanwhile, this Energy Pump device is being sold online for $80 and up. This video shows you how to make one for a little cheaper... about $70. Like all the DIY ghost hunting items, if you build more than one they get even more cost effective. For example, if you build two of these, they're only $40 each. If you build three of these devices, they're about $32 each.
An Energy Pump type device was used on the television show Ghost Hunters in season 15, episodes 1, 2, & 7.
Watch the instructional video on YouTube...
Here are the parts that you'll need, and they're all available from Amazon:
| Project Box | 9V Battery Box | LED lights |
| Motor | On/Off Switch | Heat Shrink Tubing |
| Magnets | Felt Pads |
|
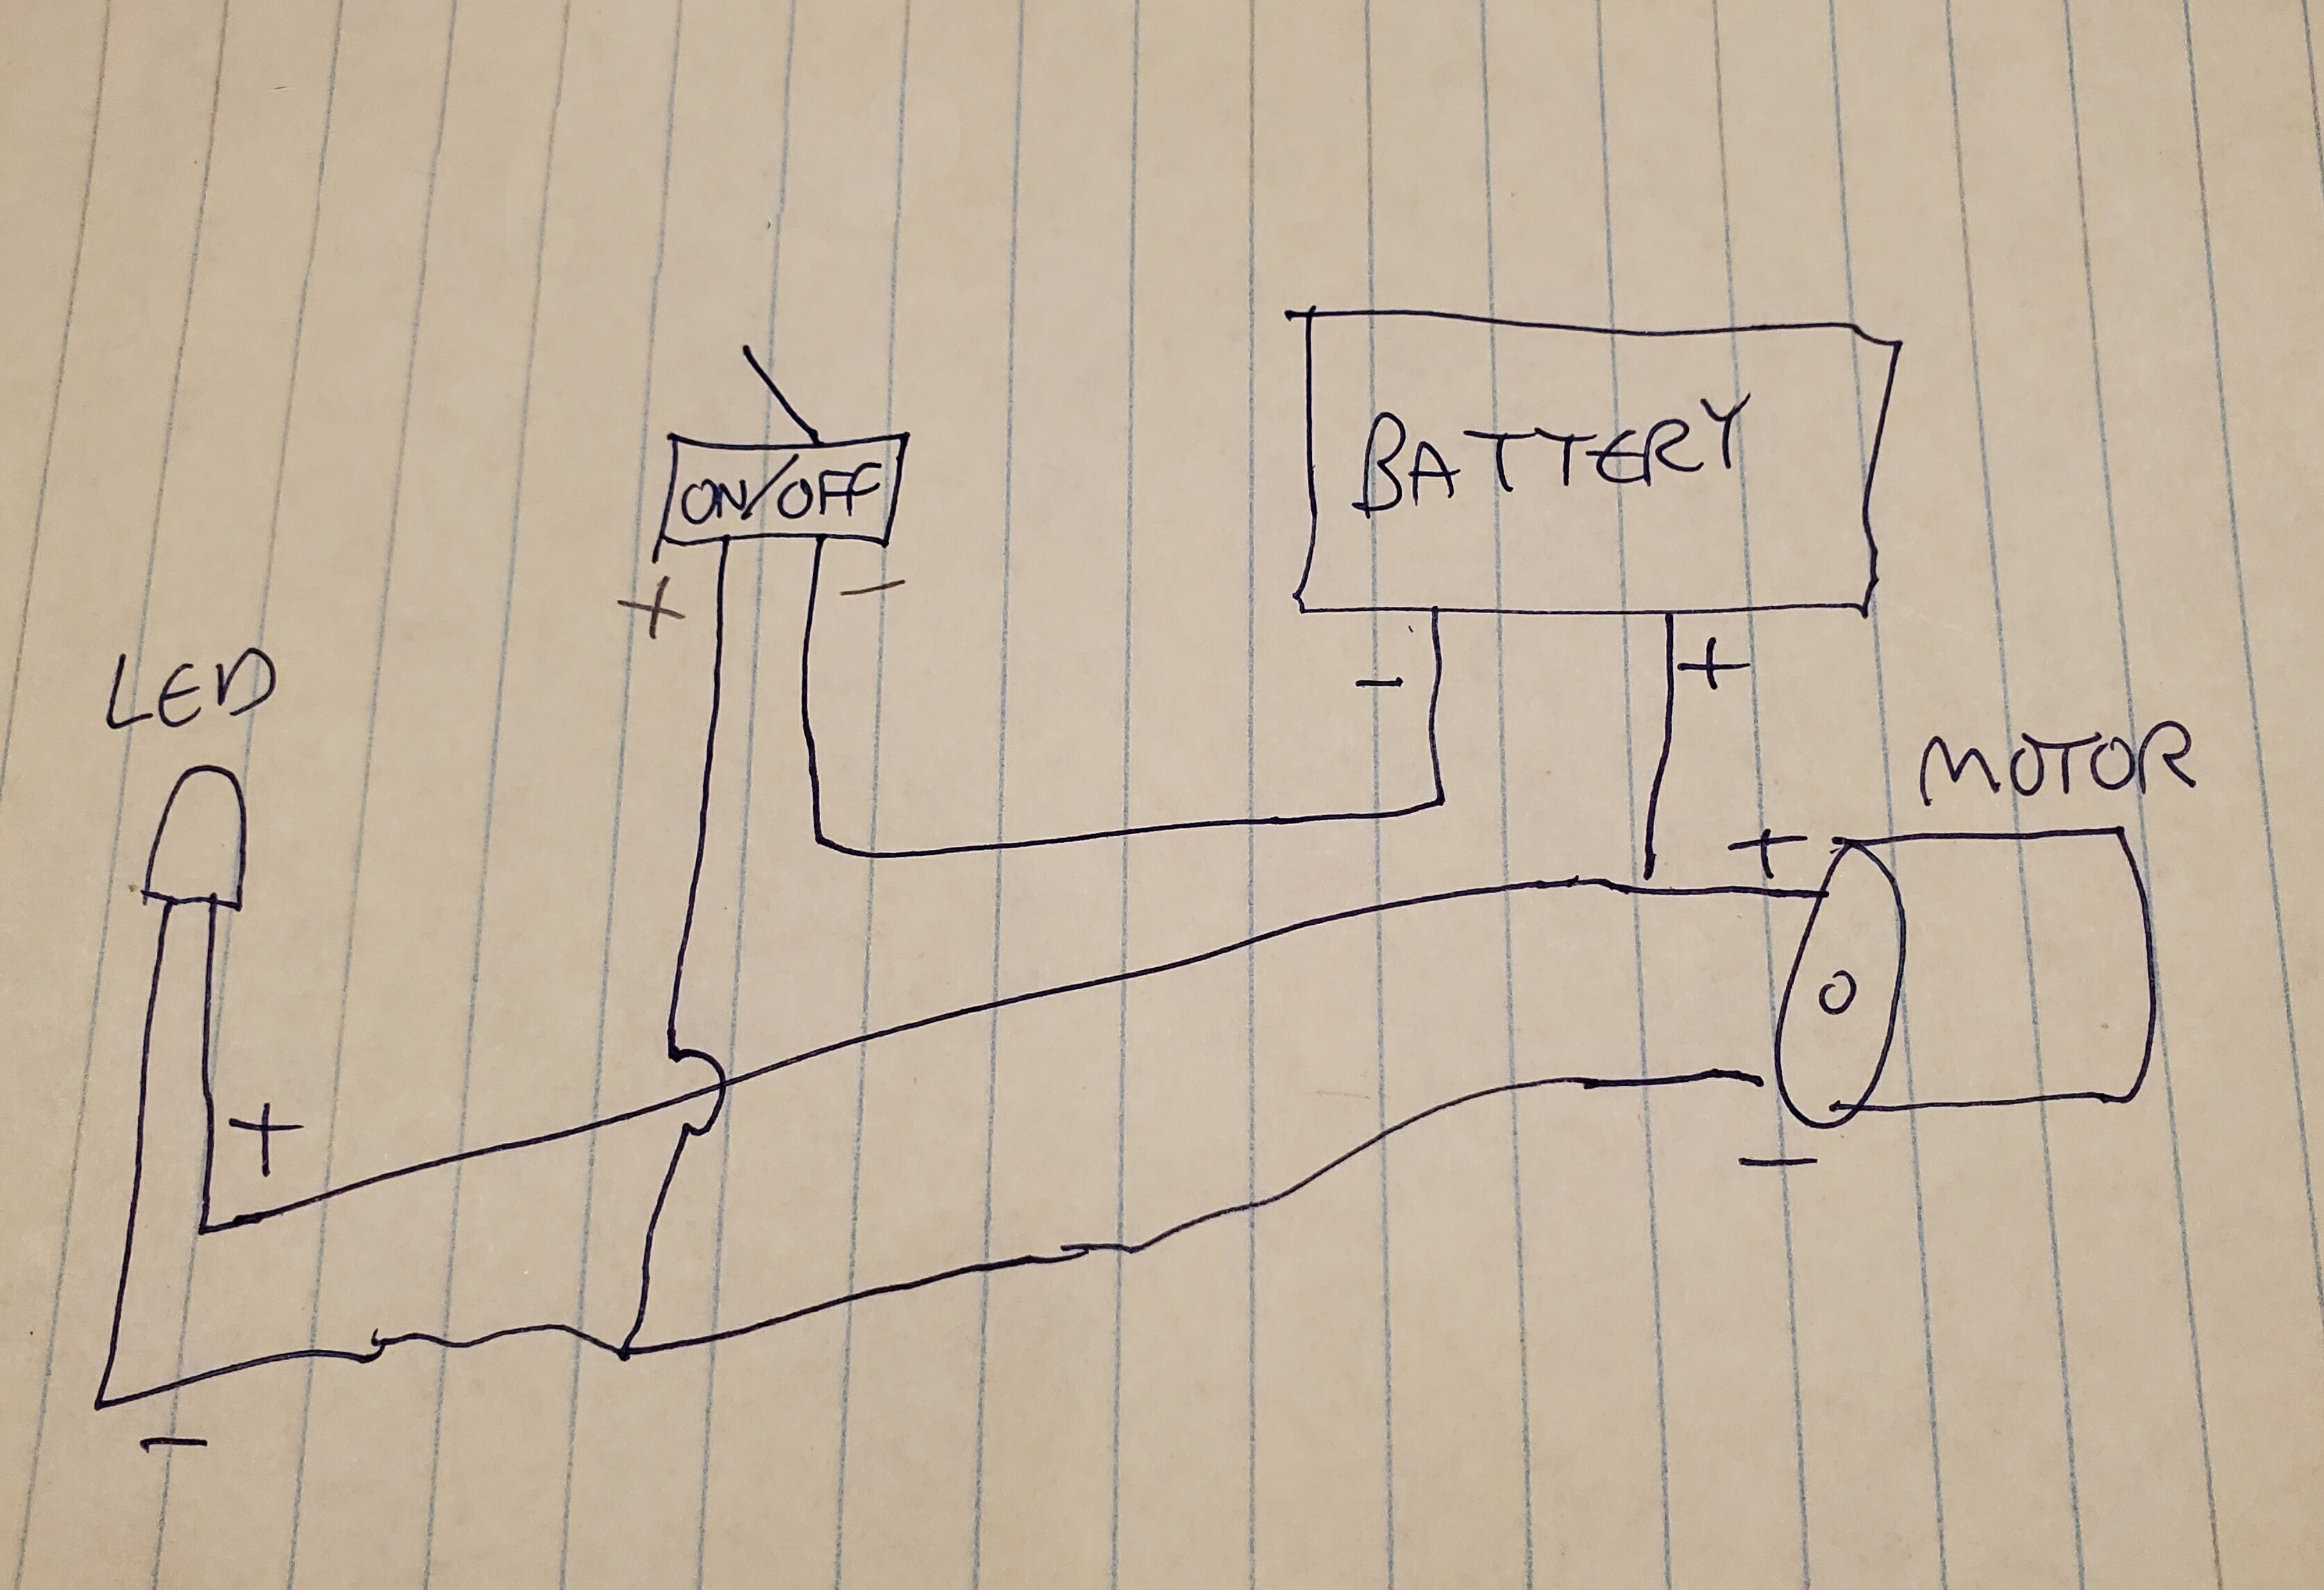
This is a very rough schematic that I drew based on the video. Right click on it, then select "Save image as" from the menu. It will download the larger size image that you can print off if you'd like. |
Proximity Sensor
Proximity sensors are used in a few different ways by paranormal investigators. One is just to turn it on and see if any unseen energy interferes with it (setting off a visual and audible alarm). Another is to use it with a verbal prompt: �If there�s anyone here in the room, can you please go over to the green light?�
One of the most popular proximity sensors is the REM Pod�. There are any number of build-your-own-REM-Pod� YouTube videos available, and most are pretty much the same. First of all, the name REM-POD� is a registered trademark of DAS Distribution, so it legally can't be used for anything but one of their devices. Having said that, both the Rem Pod� and the proximity sensors on YouTube use the same technology as that of the musical instrument called the "theremin."
Now, I own a REM Pod� that I really love. It's a great piece of ghost hunting equipment - the only problem is that I paid $192.00 for it, so I can't really afford to buy a couple more for when I'm on an investigation. Fortunately, the same basic technology is available in a DIY proximity sensor.
If you order everything to build just one of these, it will cost $45.95 at the time of this writing. Build two at the same time, and you'll have the extra parts so that they only cost $28 each. Build three and they're $22 each, four and they're $19, and if you build five, they are only $17 each. I know one ghost hunting group that built several at once, and labeled each one as "1," "2," "3," etc. so that they could document which one was in which location, and note that in their investigation reports.
The video should be posted in the next few days!
Here are the parts that you'll need, and they're all available from Amazon:
| Door Alarm | Heat Shrink Tubing | LED Lights |
| Volume Control | Antenna |
|
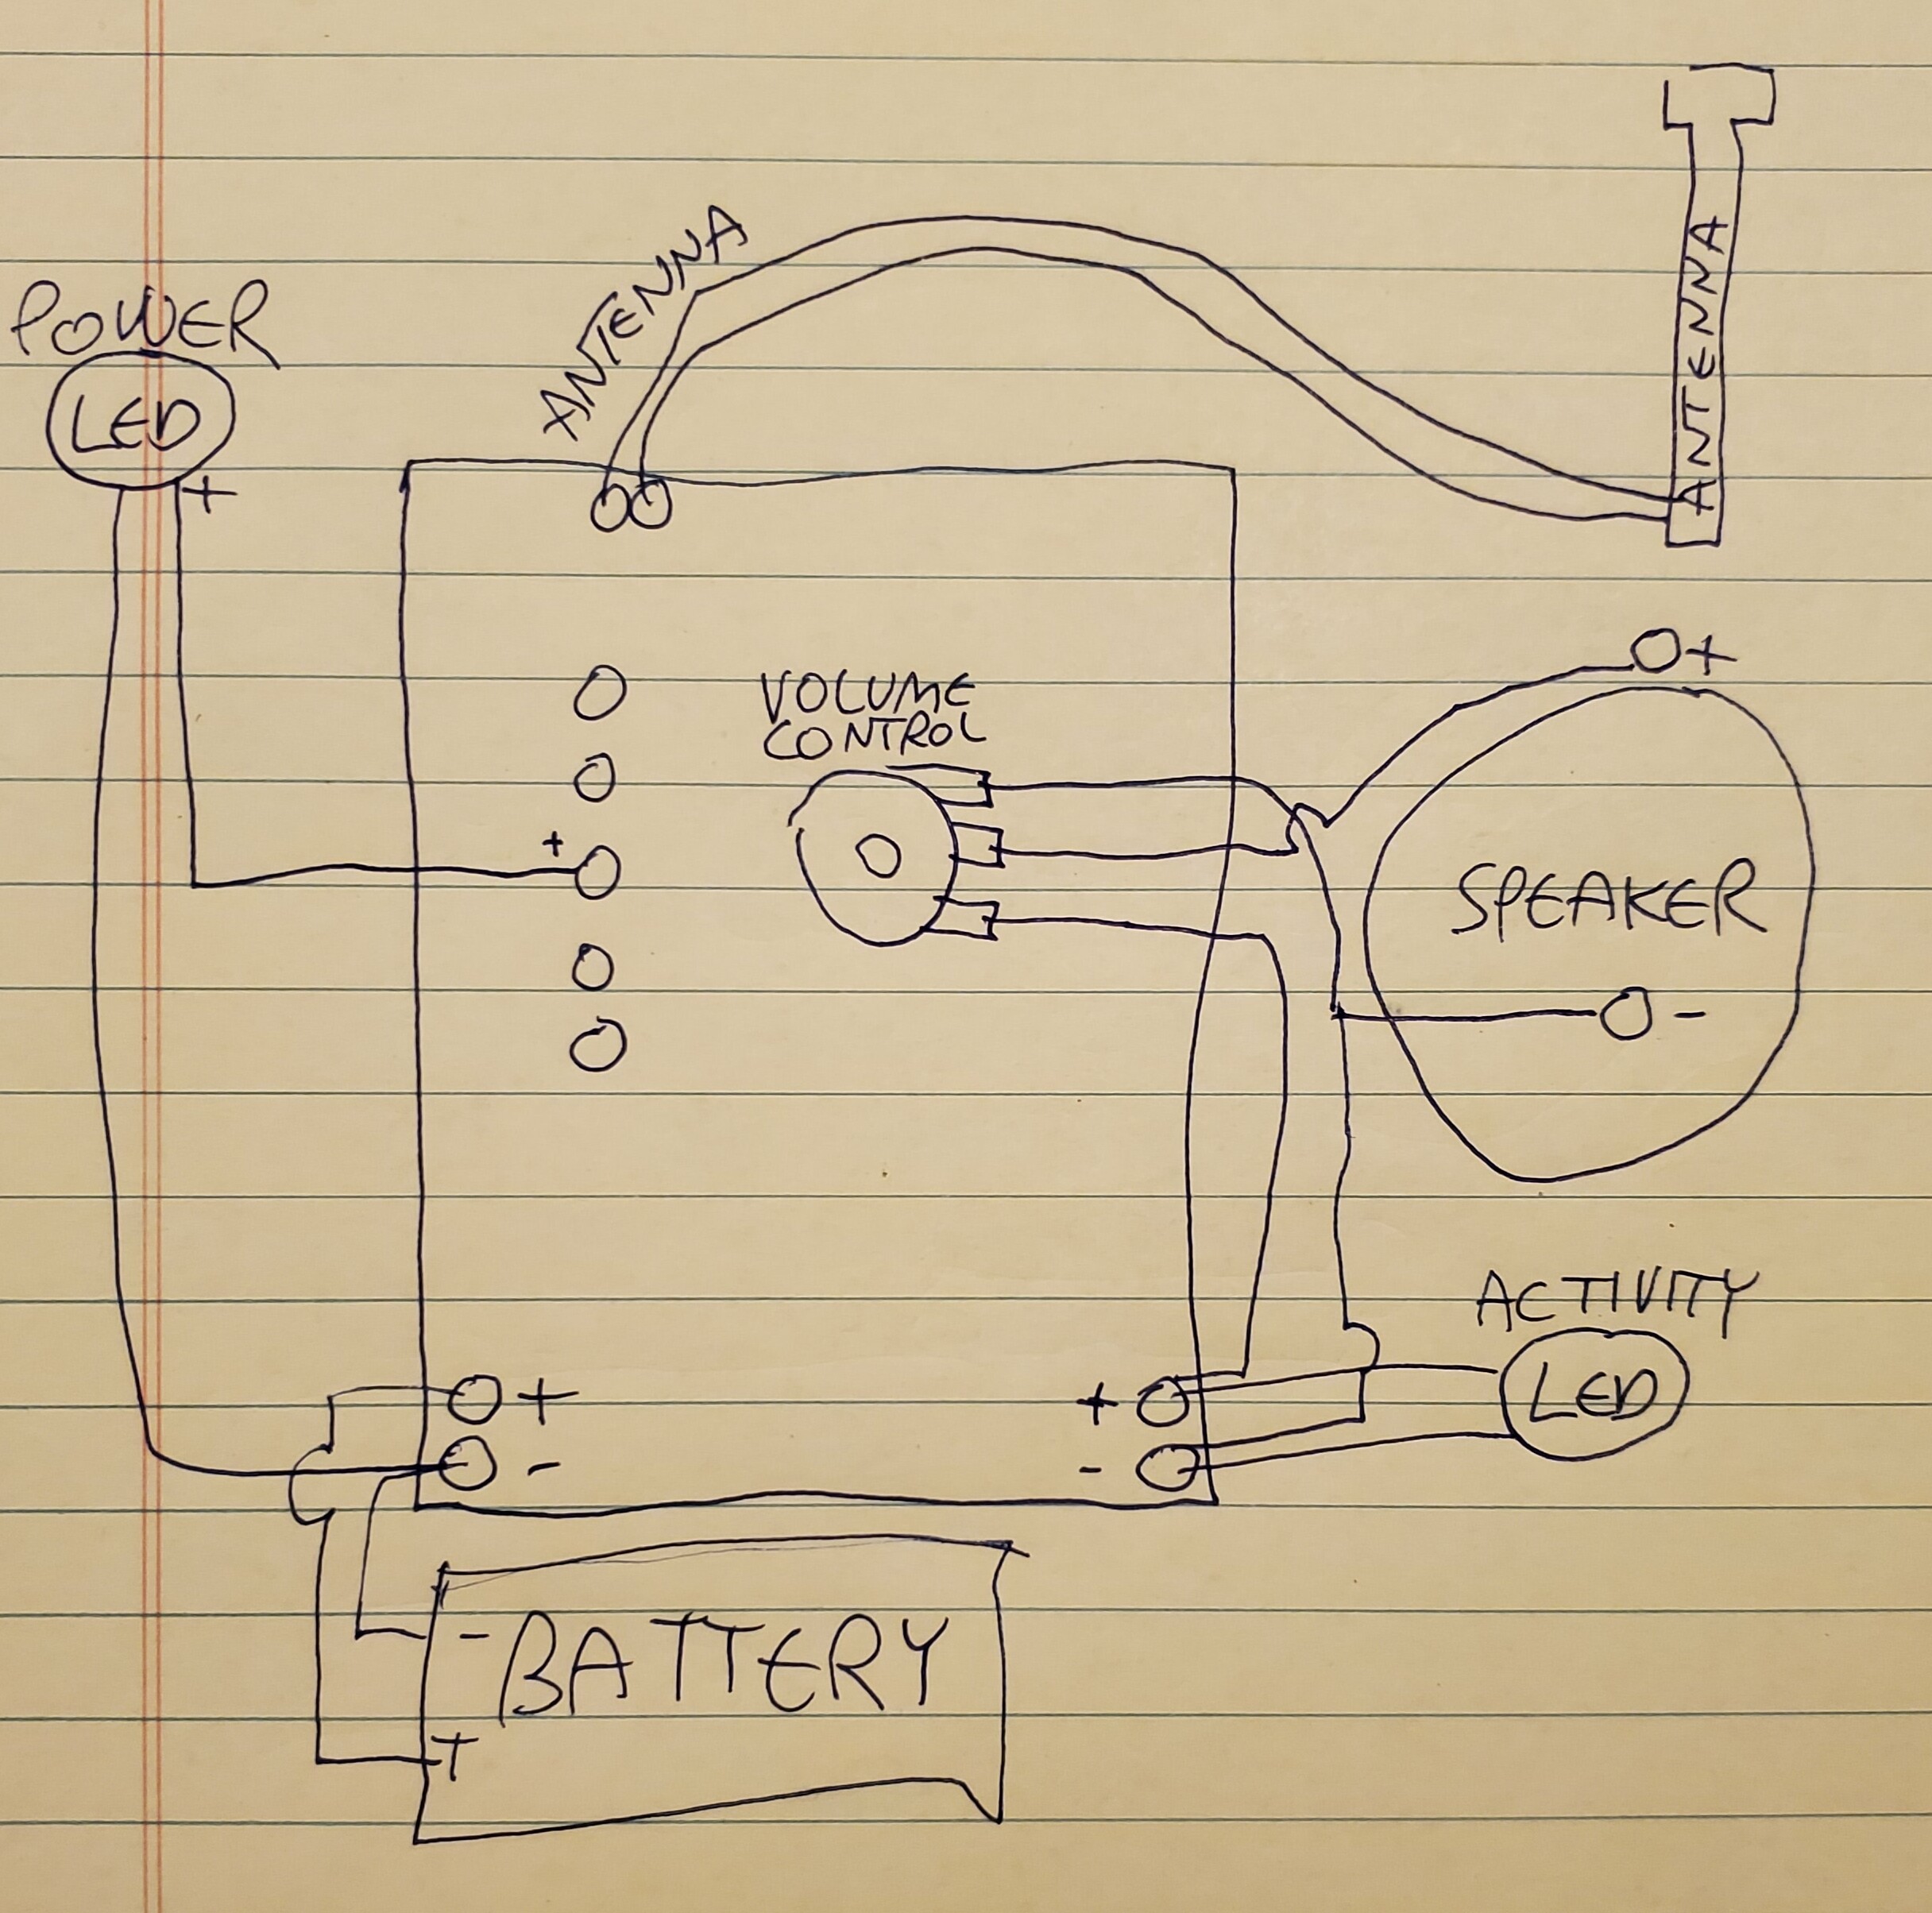
This is a very rough schematic that I drew based on the video. Right click on it, then select "Save image as" from the menu. It will download the larger size image that you can print off if you'd like. |
Flux2-type Yes/No Device
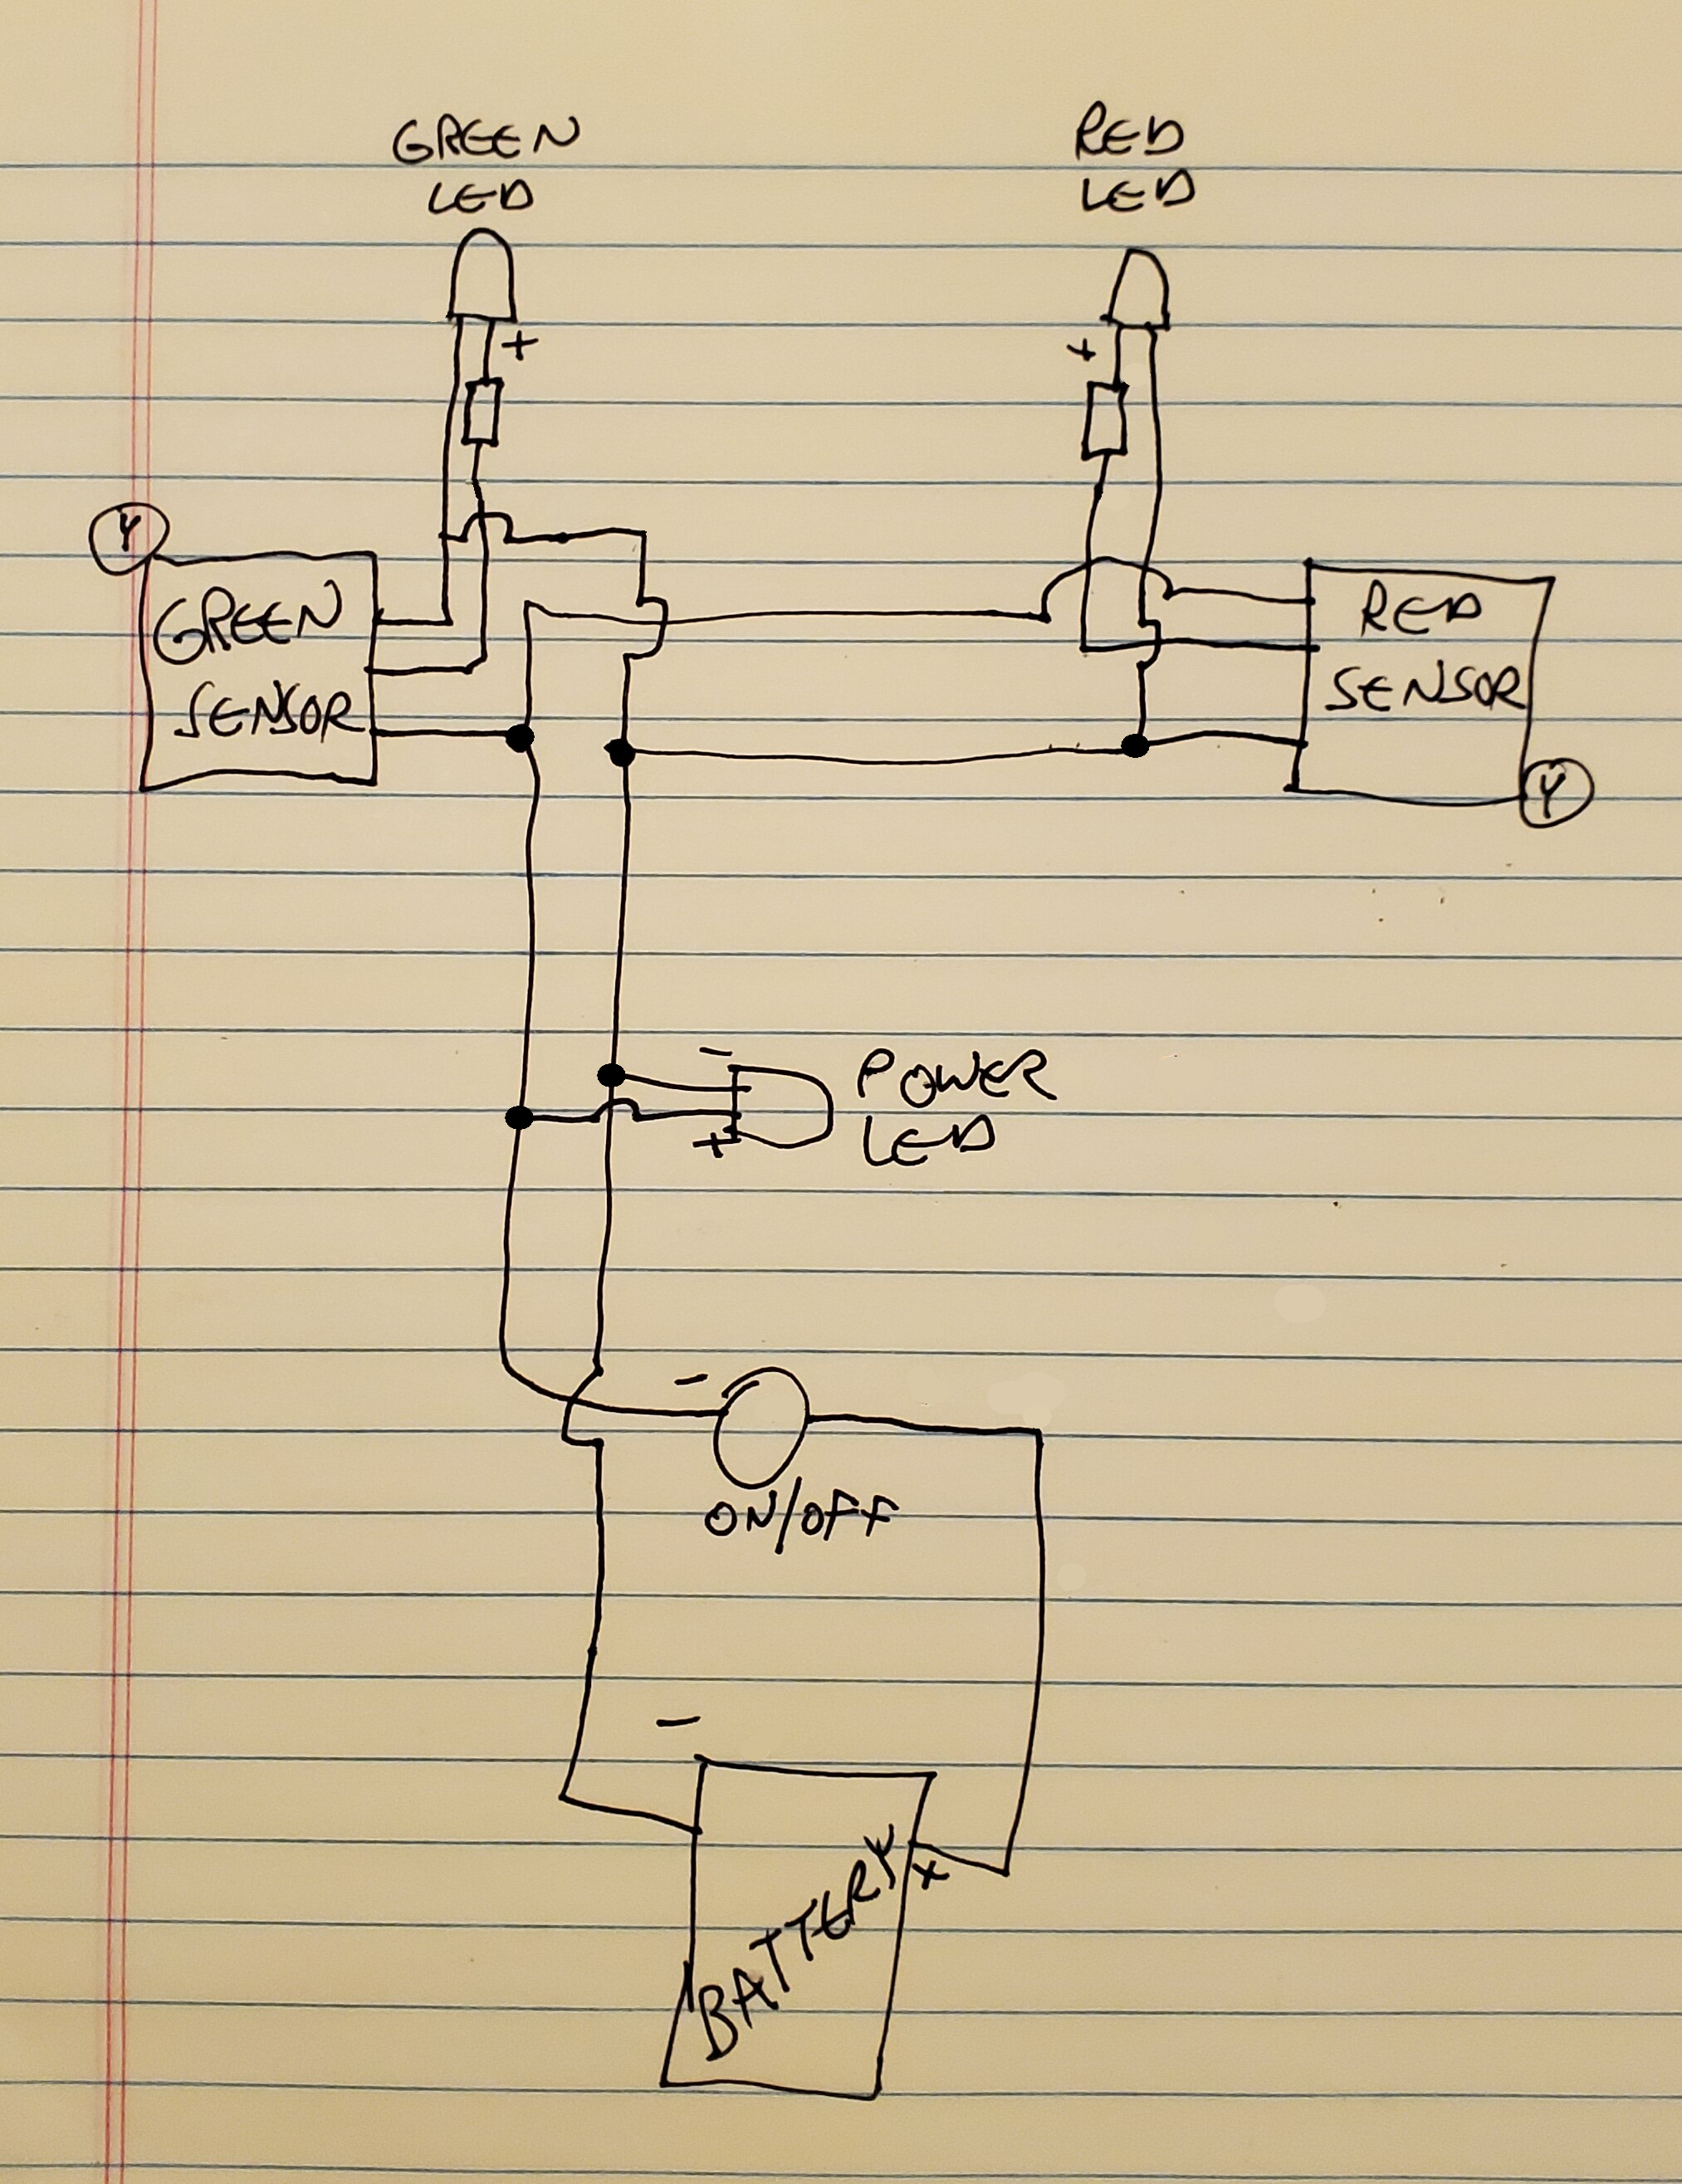
| The Flux 2 is a ghost hunting device that provides clear responses which you can see and hear during a paranormal investigation. You simply turn it on, ask your question, and wait for a response. You can ask any Yes or No questions, and ask for a green light for Yes, a red light for No. It also has distance indicators. I've seen it for sale at $200, I've also seen it listed for just under $400. Does this device work in ghost hunting? I'll leave that for you to decide. |
|
The only problem is that at $200~$400, it's hard to justify purchasing one just to test out. There is a Do-It-Yourself version that costs a lot less - about $65. If you build 2 of them, then they're only $36 each. Build 3 at the same time and they're $30 each, and if you can get 4 people to go in together, their 4 devices will only cost $25 each. That's a lot better than paying $400 - of course, the name-brand unit has audio indicators as well, and has different color lights for proximity, but the basic functionality is the same. Click on the video thumbnail below for the instructions, but read my notes afterward before you start building it.

NOTE: This is a great instructional video, but I enhanced the device that I built in a few ways:
|
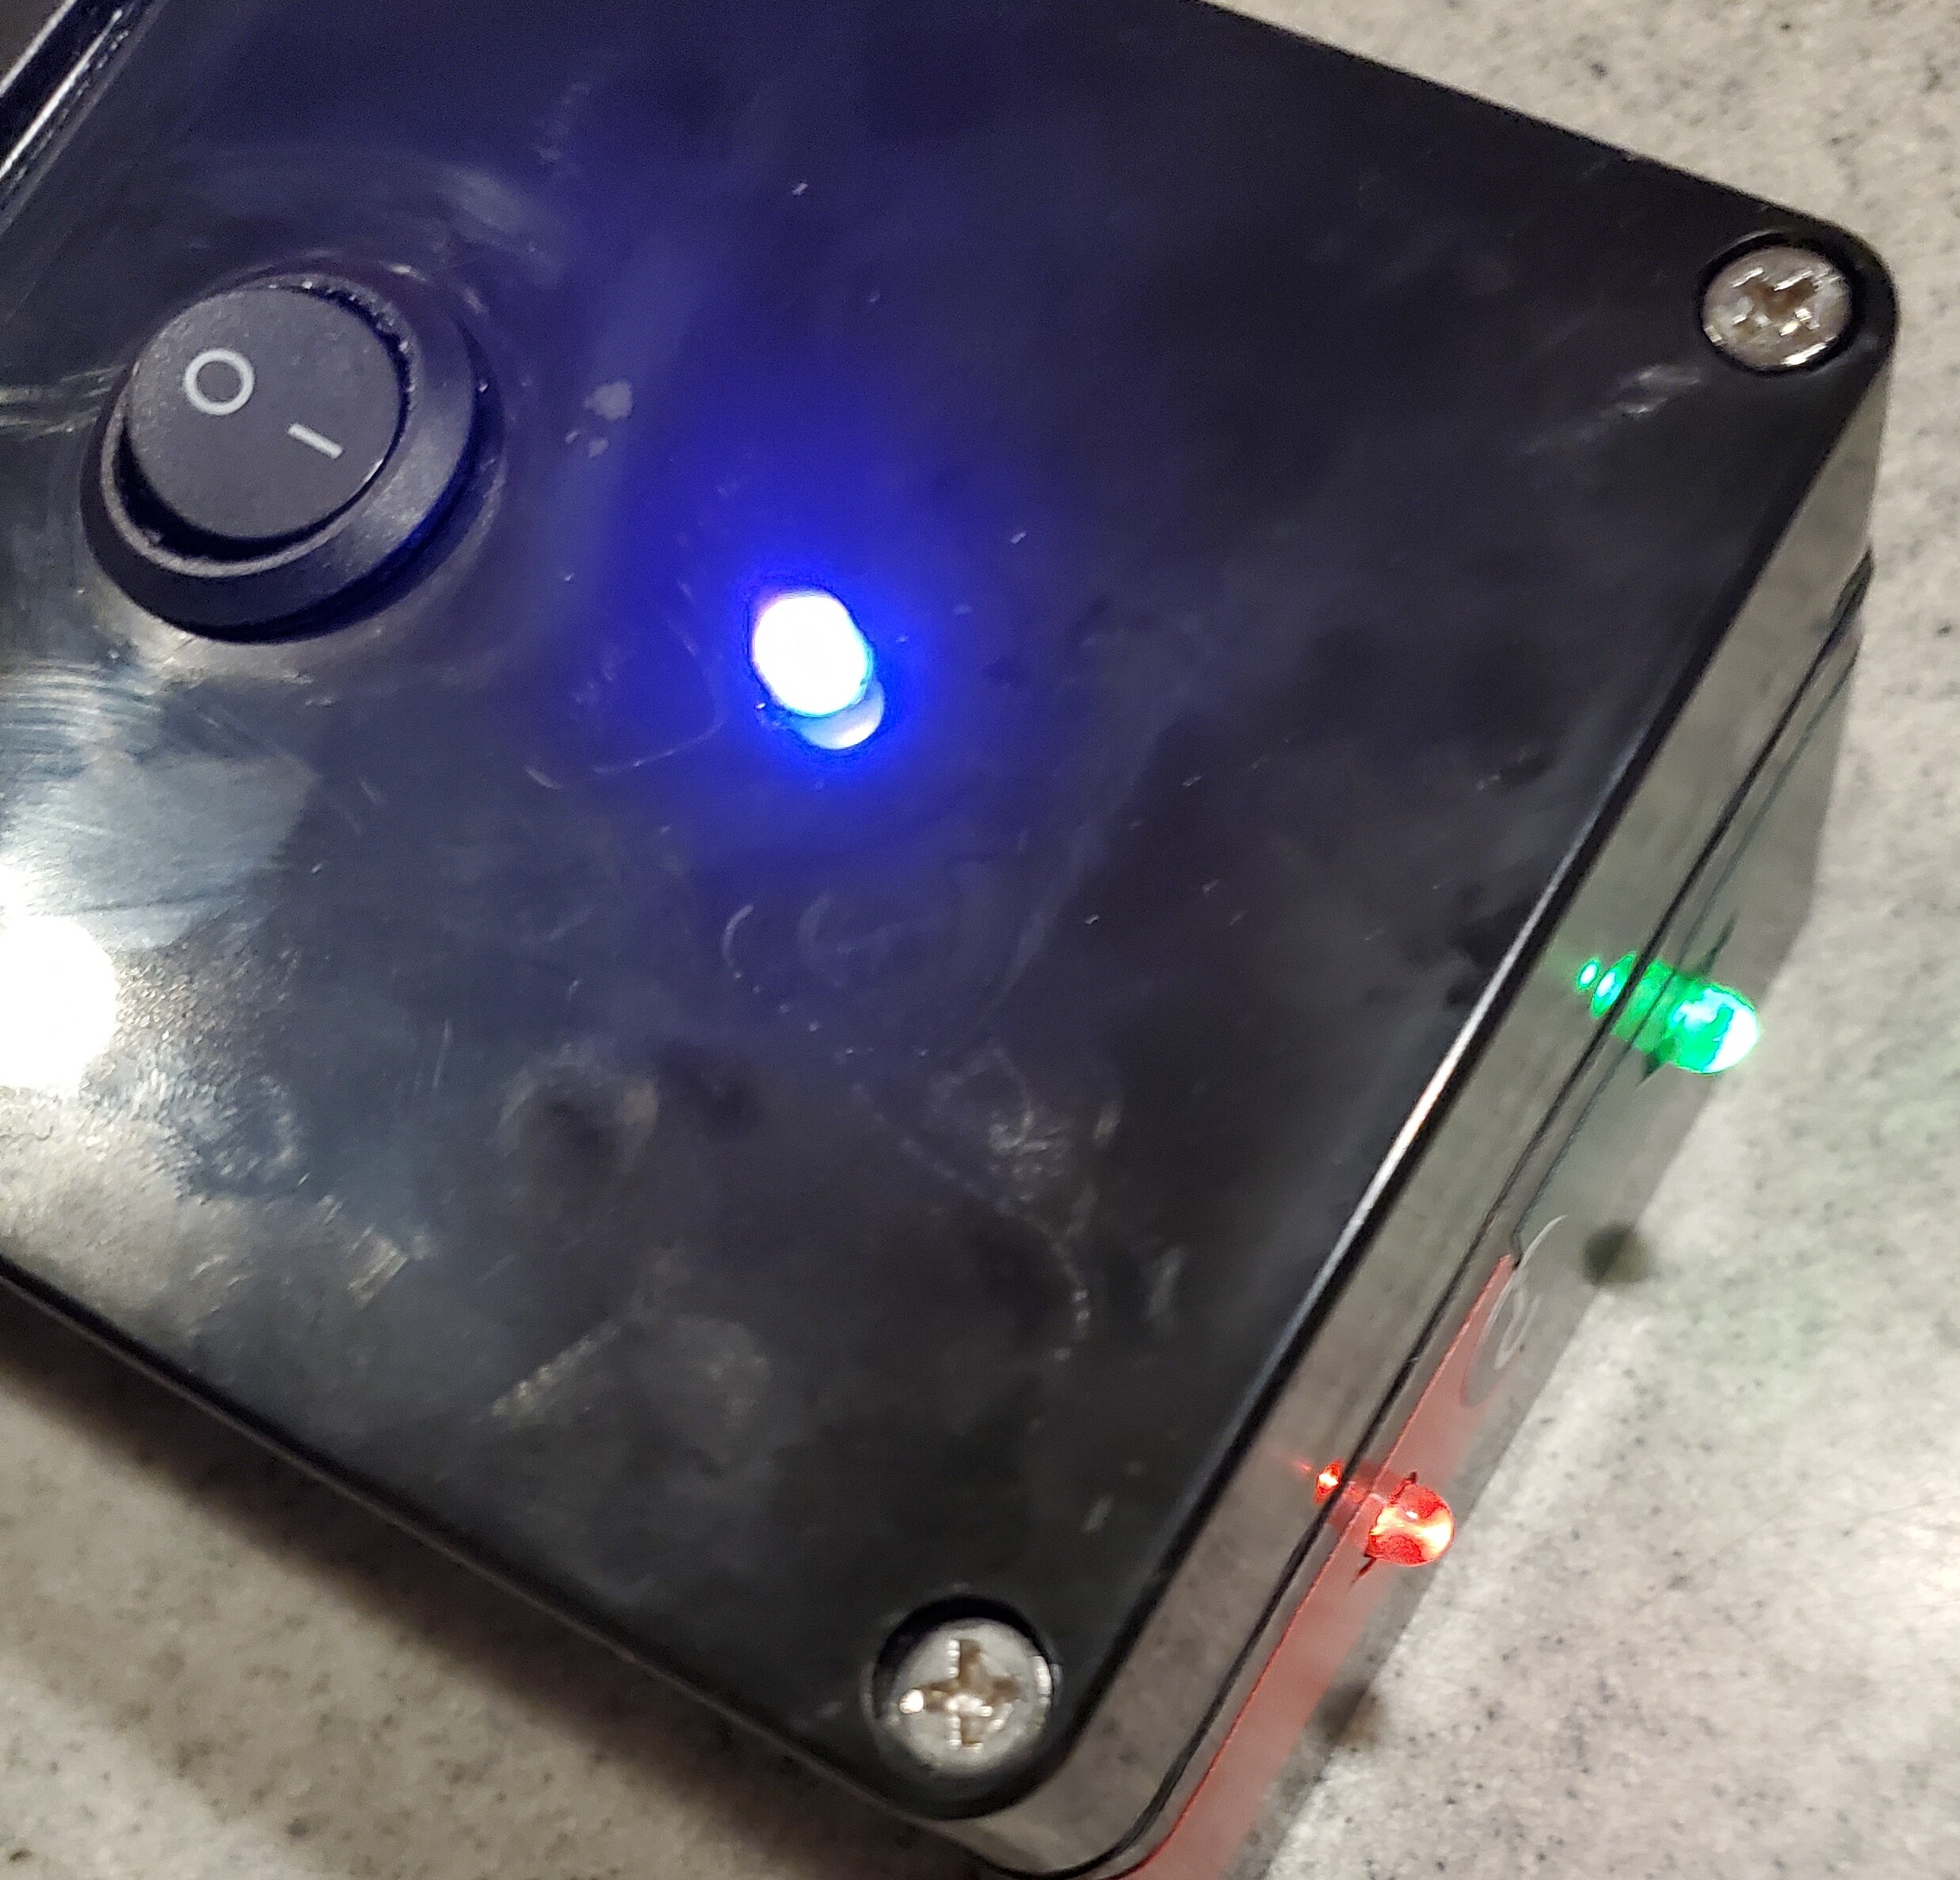
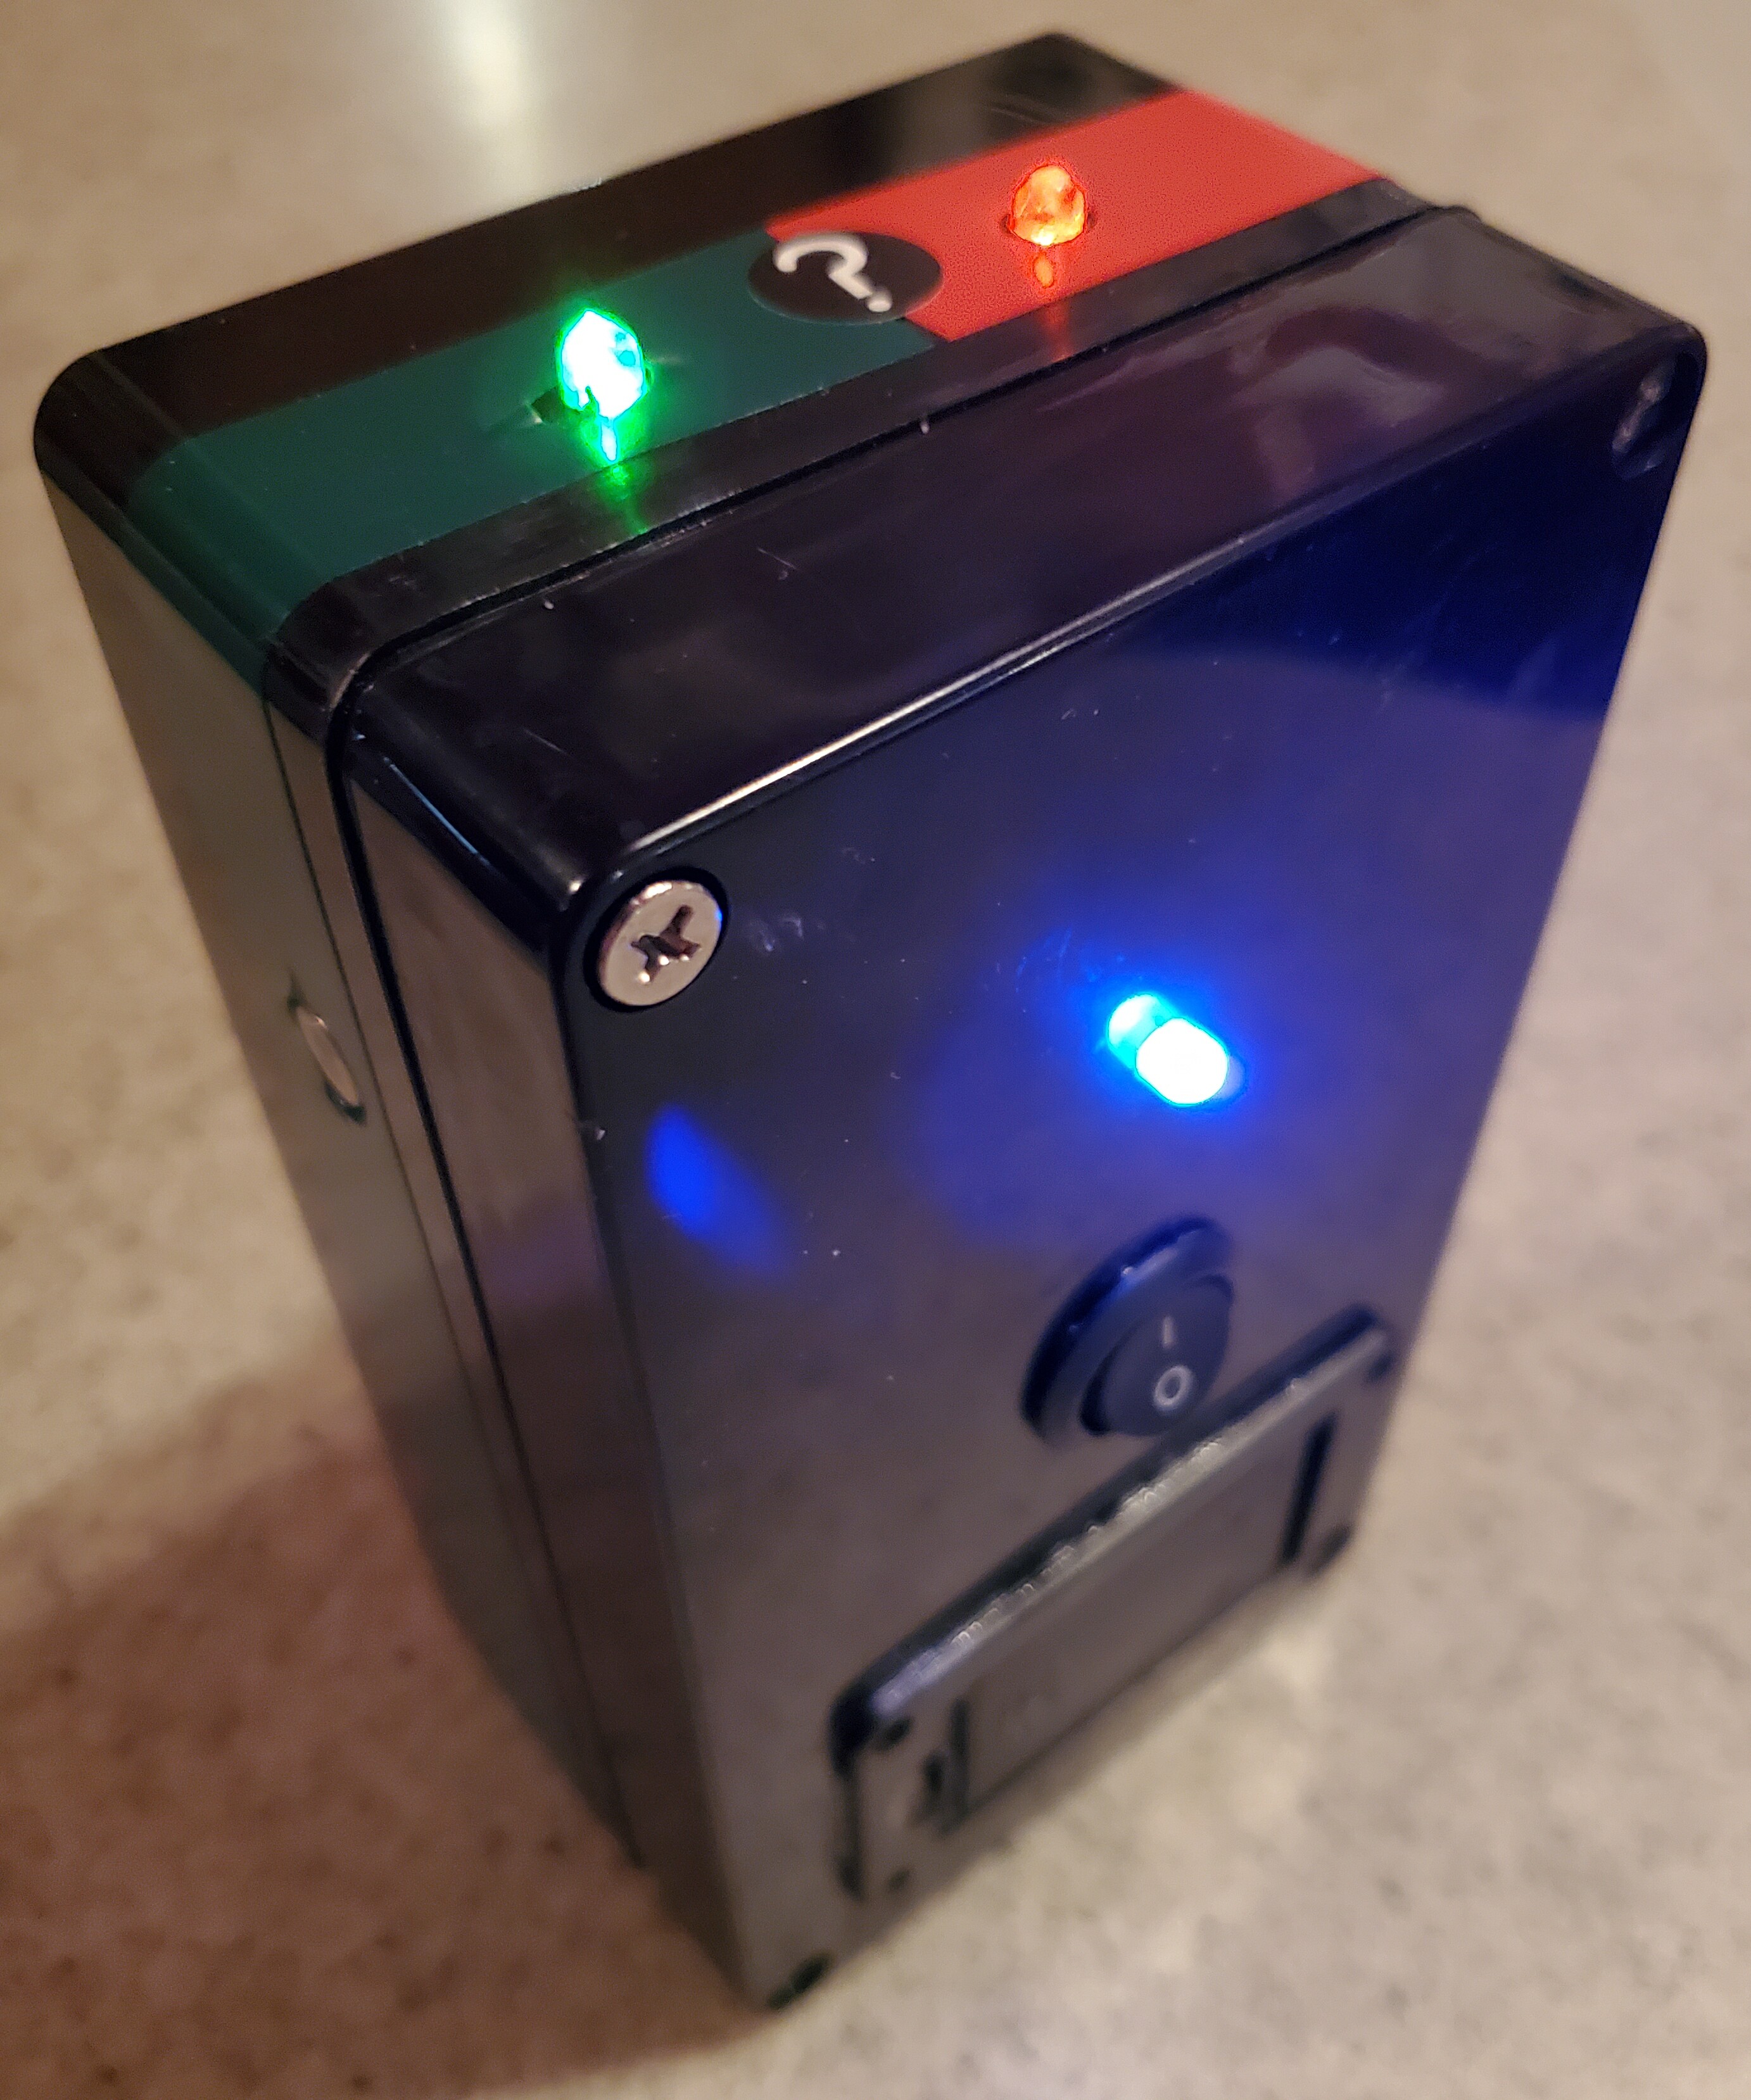
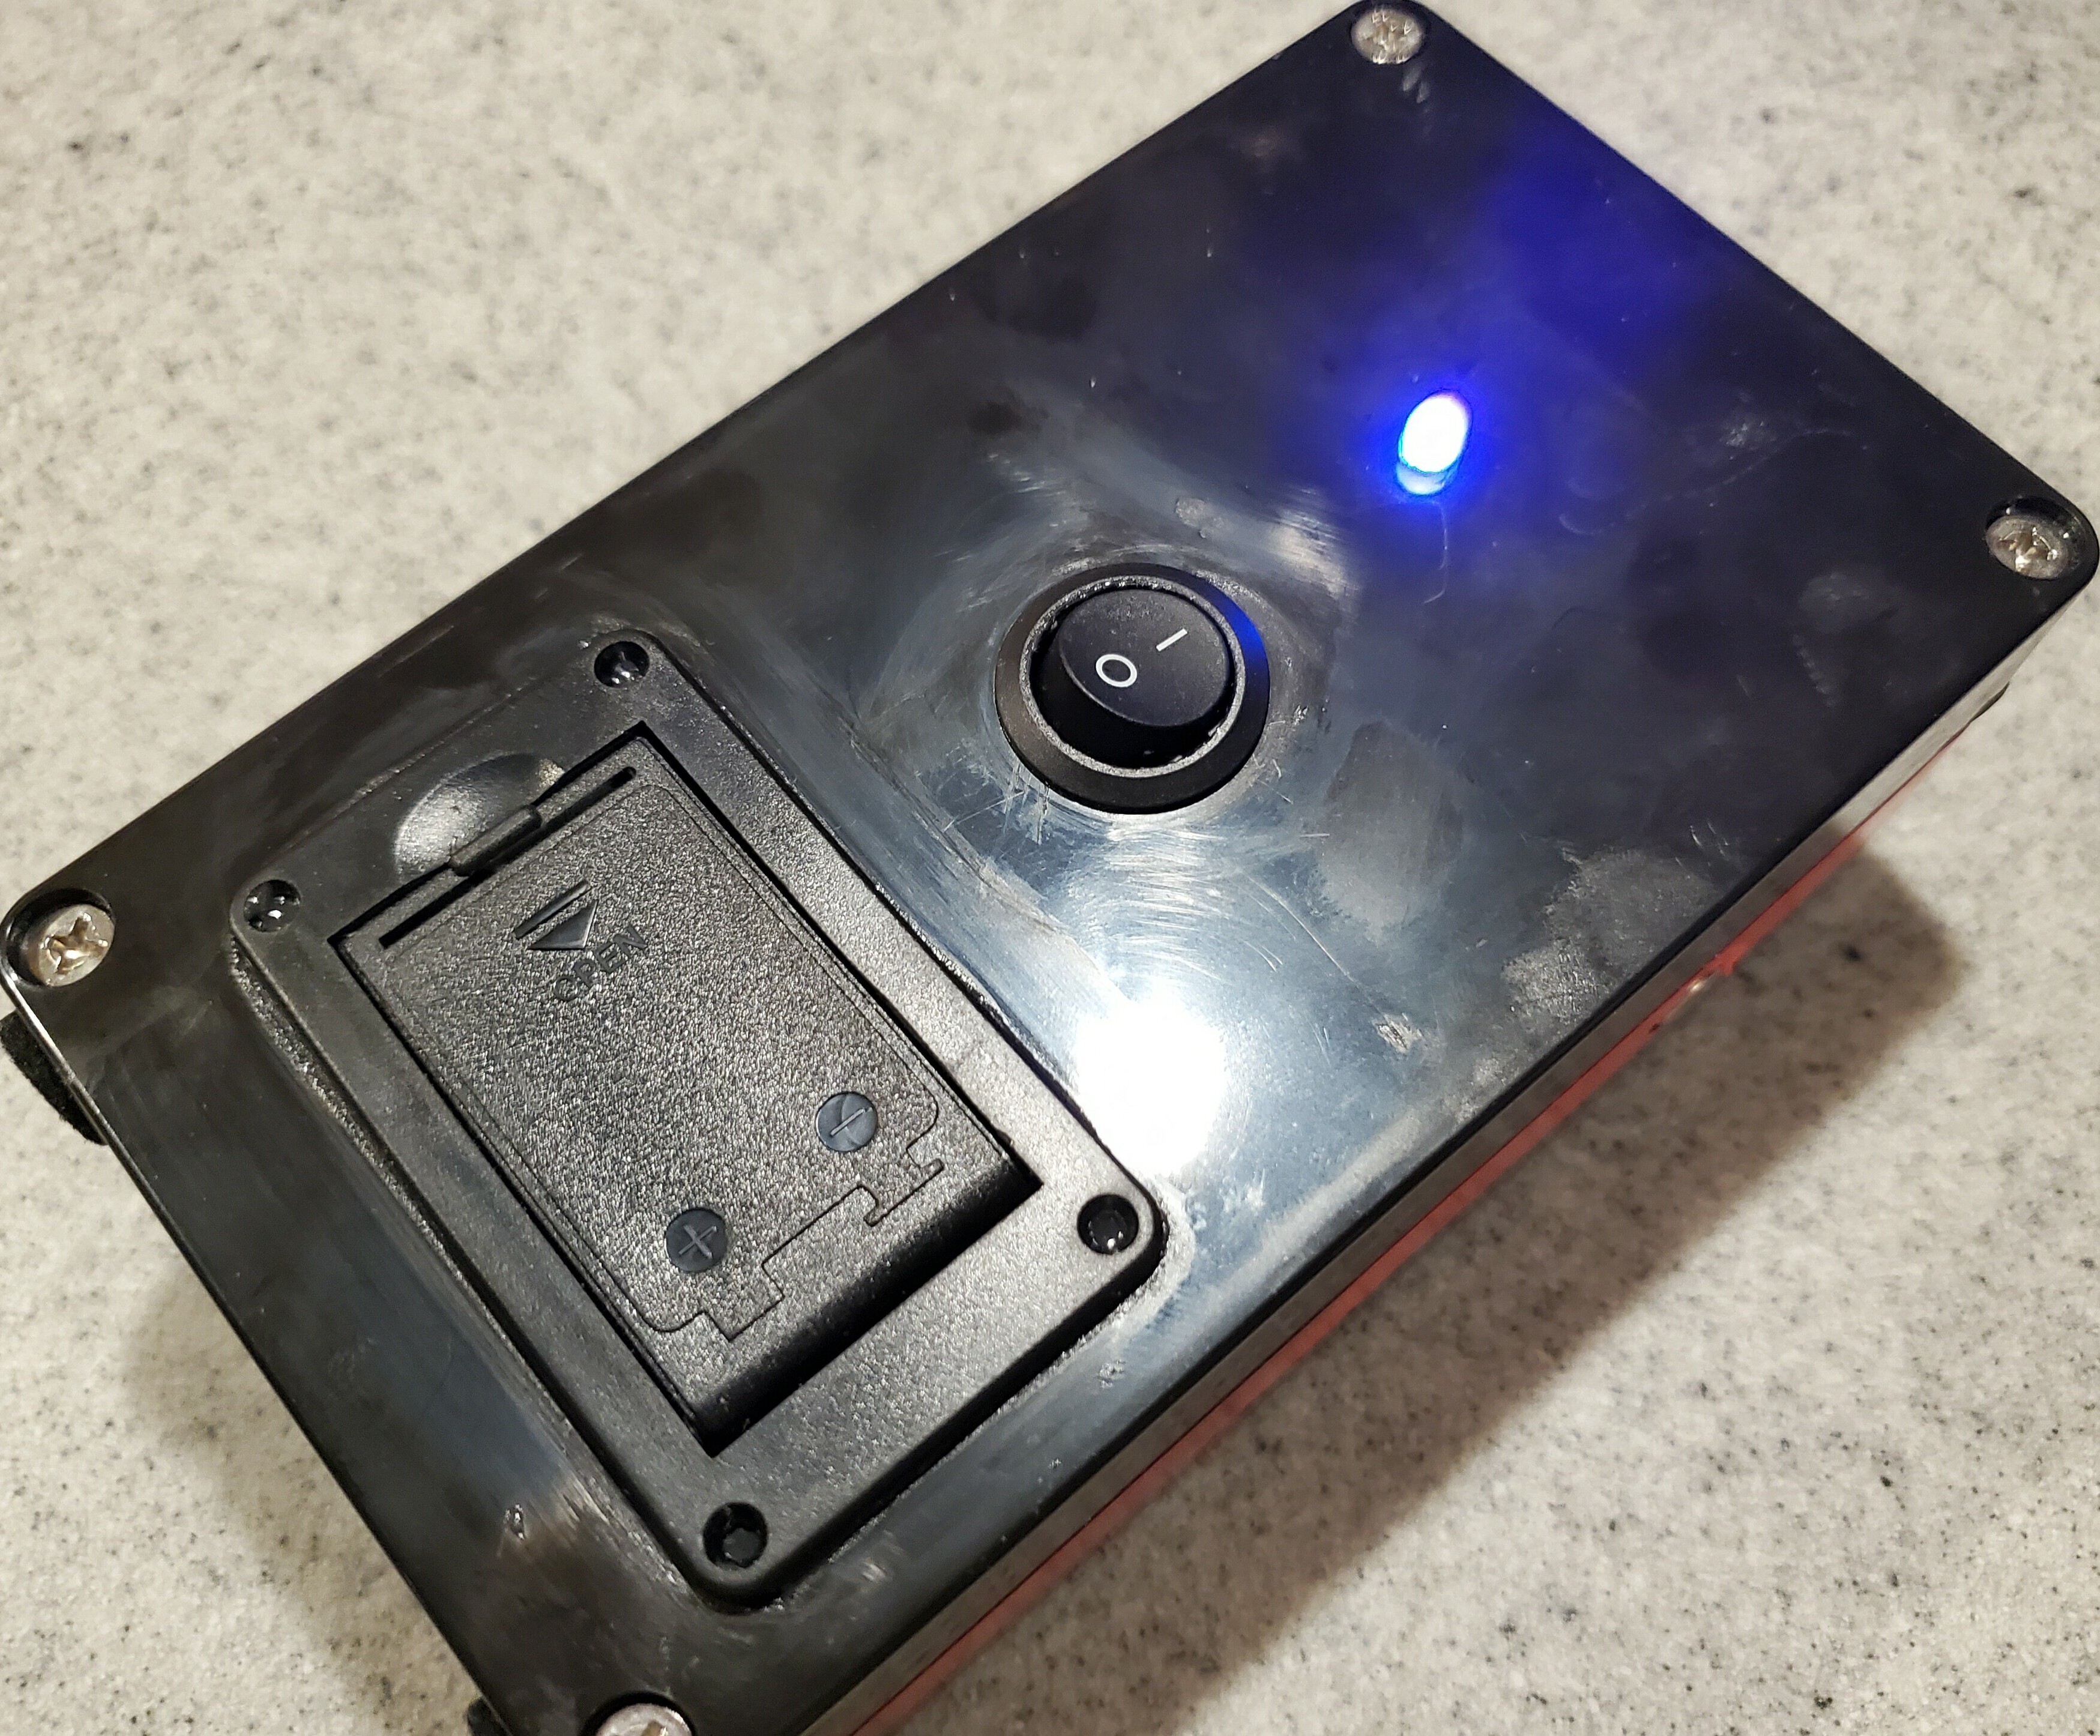
1. I want an on/off light - I want visual verification that the unit is on when I'm using it, and that it's off when I'm packing it away after an investigation. I therefore put a purple LED just above the power switch. It stays on whenever the power switch is on. |
|
2. I want a visual green and red side to the unit. I used a stripe of green electrical tape on one side, and red electrical tape on the other. I punched a hole for the lights in the tape with a regular hole-puncher like you use on paper. I cut the hole out for the motion sensor with a very small knife. IMPORTANT: I did that before gluing the sensors in! |

|
3. Inside the box I mount the two sensor movement controls facing outward so that you can adjust them should you ever need to. |
|
4. I like having a battery box that you can change without having to disassemble the project box, so I used one that's made for guitars. The link to order it is below, and watch the "EM Pump" video to see how to install it in the project box. |
|
5. Here's a very rough schematic that I drew based on the video and my enhancements.
Right click on it, then select "Save image as" from the menu. It will download the larger size image that you can print off if you'd like. It should be helpful in showing how my additional features are added in with the circuit in the video. |
Here are the parts that you'll need, and they're all available from Amazon:
| Project Box | 9V Battery Box | LED lights |
| Resistors | Motion Sensors | On/Off Switch |
| Jumper Wires | Heat Shrink Tubing | Felt Pads |
You'll also need red electrical tape and green electrical tape, which you can find on Amazon, at Lowe's, at Wal Mart, etc. Along with these you'll need a soldering iron & solder, and JB KwikWeld glue as described above.